It's been a while since I posted anything but then it's been a while since I have spent appreciable time in my shop. Knee issues and general 'too much to do' have made the trek to the shop a challenge. It's more painful for me not to be out there than it is to be there but shop safety means focusing on the work at hand. After all, I am still quite attached to my fingers. I have made a few pens and other projects that I may post later but nothing exciting or new. For now we will look ahead.
In any case, I'm back in the shop with some new helpers and observers. You'll meet them along the way.
The current project is a large one . . . finishing out our basement. Stay tuned for updates and photos of the work.
Check out what I am up to. It could be just about anything.
Wednesday, August 31, 2016
Wednesday, April 9, 2014
Adding some safety
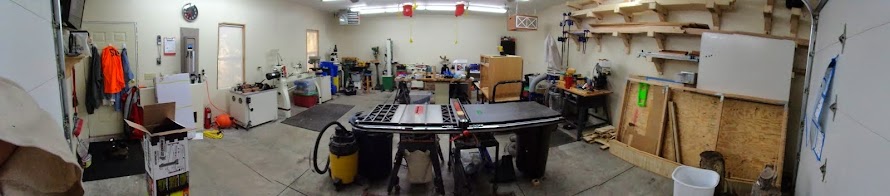
About a year ago I added an extension table and fence to my table saw. When I did that, the blade guard could no longer be mounted on the saw. Along with that went the splitter and anti-kickback pawls.


 After paying my friends at my local Woodcraft a visit, I ordered the Excalibur Over Arm Blade Cover. The arm mounts to the end of my table extension and reaches over to suspend the guard over the blade. It includes a connection to my dust collector to remove dust from the area of the blade.
 The support bracket mounts on the end of the extension table. There is an unpublished requirement that the table top be a minimum of three inches thick. I rabbeted a 2x6 to fit the end of the table to expand the thickness. The six mounting bolts go through the end of the table top and the added board.

The mounting bracket includes a lock mechanism. When unlocked, the arm can swing to the back of the table to be completely out of the way. When in the locked position, there is an adjustment to make sure the arm returns to be in alignment with the blade. The vacuum system attaches to the bottom of the arm at this point.

Installed, the arm has plenty or reach and strength to be over the blade. Support arms under the table provide adjustment to get the arm parallel to the table top. A flexible pipe delivers the suction from the overhead arm to the guard.


Parallel arms keep guard level to the table.

A handle locks the guard out of the way.
Next stop, a zero clearance insert and splitter.
The support bracket mounts on the end of the extension table. There is an unpublished requirement that the table top be a minimum of three inches thick. I rabbeted a 2x6 to fit the end of the table to expand the thickness. The six mounting bolts go through the end of the table top and the added board.The mounting bracket includes a lock mechanism. When unlocked, the arm can swing to the back of the table to be completely out of the way. When in the locked position, there is an adjustment to make sure the arm returns to be in alignment with the blade. The vacuum system attaches to the bottom of the arm at this point.
Installed, the arm has plenty or reach and strength to be over the blade. Support arms under the table provide adjustment to get the arm parallel to the table top. A flexible pipe delivers the suction from the overhead arm to the guard.
Parallel arms keep guard level to the table.
A handle locks the guard out of the way.
Saturday, February 8, 2014
Turning Duck Calls
Something I have been making a few of here and there is duck calls. Using an insert from Woodcraft, I turn the body using the included instructions.
 In this particular case I wanted to use some wood from my property and I was looking for wood with plenty of figure. I selected a knotty area of this black walnut branch.

After cutting the needed length, I squared up the blanks and cut them to final length. As I had hoped, the grain in the blanks was wonderful.

 The hardest part of making the duck calls is drilling the necessary holes. The smaller one, at 31/64ths, is only 2 inches long and pretty easy. On the other hand, you also need to drill a 3/4 inch hole 4 inches long. Both holes need to be centered and relatively straight.
Mounting the blanks is slightly different than some turning. The kits sold by Woodcraft use an expanding foam chuck that passes through the drilled holes. Turning is done one piece at a time.
The shape of the call be almost anything you want. I like to make mine easy to handle.
As planned, the grain has a lot of movement to it and is enhanced by the finish. This is the mouthpiece. The large tenon will hold a brass ring that will protect the call from a lanyard.


The finished call.

Friday, November 29, 2013
Product Test - Emile Henry Bred Cloche
I love bread and was really excited to test the Emile Henry Bread Cloche. The unit met all expectations and promises.

Initial impressions: Upon unpacking the I was immediately impressed by the finish on the unit. The exterior of the cover and the upper surface of the plate has an extremely smooth semi-gloss finish on it. Mine is a beautiful black and I'm sure the red is equally attractive. The finish feels like a quality finish. It is smooth but not slippery.
 First use: I chose to use a recipe I was familiar with instead of one of the nice selection of recipes that came with the cloche. The recipe was intended to make two loaves so I baked one in the cloche and one in the open oven per the directions.

I shared both loaves with our dinner guests and asked their opinion on the differences telling them only that I used two different baking methods. The loaf from the cloche won hands down. My guests felt the loaf had a more pleasing crust, a nicer texture, and better flavor.

Clean up was easy though I do have questions for the manufacture regarding care of the unit. The inside of the cover is not sealed and I wonder about getting it wet or getting soap on it.
The plate is grooved and I found, per the instructions that came with the cloche, that a light coating of flour was sufficient to eliminate sticking. I was able to wipe off the bulk of the flour with a dry paper towel and removed the remainder with a damp rag.
 With a 10 year manufacturers warranty I can look forward to may years of amazing bread. The homemade bread I used to make and love just got way better.

Initial impressions: Upon unpacking the I was immediately impressed by the finish on the unit. The exterior of the cover and the upper surface of the plate has an extremely smooth semi-gloss finish on it. Mine is a beautiful black and I'm sure the red is equally attractive. The finish feels like a quality finish. It is smooth but not slippery.
 First use: I chose to use a recipe I was familiar with instead of one of the nice selection of recipes that came with the cloche. The recipe was intended to make two loaves so I baked one in the cloche and one in the open oven per the directions.
I shared both loaves with our dinner guests and asked their opinion on the differences telling them only that I used two different baking methods. The loaf from the cloche won hands down. My guests felt the loaf had a more pleasing crust, a nicer texture, and better flavor.

Clean up was easy though I do have questions for the manufacture regarding care of the unit. The inside of the cover is not sealed and I wonder about getting it wet or getting soap on it.
The plate is grooved and I found, per the instructions that came with the cloche, that a light coating of flour was sufficient to eliminate sticking. I was able to wipe off the bulk of the flour with a dry paper towel and removed the remainder with a damp rag.
 With a 10 year manufacturers warranty I can look forward to may years of amazing bread. The homemade bread I used to make and love just got way better.
Sunday, August 18, 2013
Product Test - WeatherSmart Pro
The WeatherSmartPro is part weather station and part sprinkler system controller. The two components work nicely together to manage the amount of water delivered to your landscaping.
 The weather station component is a wireless remote that provides temperature and rain amount information to the controller. It comes with a sturdy aluminum bracket and mounting screws. The bracket is designed such that it can be mounted in most any position you need.
Programming is highly flexible and easy. For starters, the controller can handle 6 circuits. Add to that a ton of flexibility in when it cycles. You have multiple start times with options to water on odd or even numbered days, every day, or selected days of the week.
Then there's one of the best features. The controller uses the temperature and rain amount information from the wireless remote to adjust the amount of water delivered. This provides easy and automatic water conservation. As I think back to when I lived in California, this would have meant I didn't need to reprogram the controller between winter and summer.
The documentation for the system is well written being clear, accurate, and well organized. About all you will need it for is the steps to establish the communications between the controller and the remote. It's not that it's hard. It's just easy to get excited and do things in the wrong order. Programming the controller is intuitive and quick.
All in all, this is a great product that I would highly recommend. And hey, the box came with labels that said it was next to nothing or free for some areas. I don't think you can go wrong.
Sunday, April 7, 2013
Shop Organization Projects
 My shop cabinets have been on hold because there just hasn't been room to work. With the addition of the longer table saw fence and the lathe, storage for the cabinet wood materials became a must. A place for sheet goods and sticks has been in the plans since the early shop layout plans so it really just became time to build them.
Like my cabinets, I started by building what was in my head in SketchUp. Below is the wall mounted stick storage drawing.

The arms are some left over 1/2 inch plywood. The remainder is 2x4s.


The sheet goods rack is 2x4 and 2x6 materials. The three racks aren't attached to each other or the wall so when I don't have any sheet goods in the shop I can move them out of the way retask the wall space. I think they would even work away from the wall.

Saturday, March 23, 2013
New in the shop
 It's here. My new Jet 1642 lathe that is.
The lathe has a 16 inch capacity over the bed and much larger when the head is pushed to the other end bed and you turn off the end. At 2HP it has the power to spin it too.
Manufacturer's website
Woodcraft website

Getting it into the shop was loads of fun and took five people. More on that when I get the pictures. I need to thank Steve, Travis, Thomas, and Grace for taking a night out of their schedule to help me. Also Barb for grabbing an baking pizzas for the lot of us.


The head stock has some great features. A spindle lock and index, digital readout, reverse, and speed control are all in easy reach. The power source for the machine is 220V single phase but it has a built in inverter that converts it to three phase. According to the manufacturer that makes for smoother speed control throughout the range. One thing I know, this thing is quiet. No vibration, no noise.
Next up is spring cleaning and some racks to hold my supply of wood.
Subscribe to:
Posts (Atom)