We continue to be impressed with how our container garden is doing. We've added trellises for the beans and peas and it looks like we will have more zuchini and cucumbers than we can eat.
See for yourself. Here's how it looked this morning.
Wednesday, July 4, 2012
Tuesday, July 3, 2012
Back in seclusion
So I can't tell you what I working on now because it is a gift. Not even from me in some cases. Each one is unique and all are going to be amazing. Pictures will follow as the delivery occurs.
Hey! The shop is officially a man-cave. On Saturday I set up my new 42" TV and Internet connected Blu-ray. I also found out that when I hook my cell phone up to the TV I have a true web browser (Firefox) and access to all of the apps I have on my phone. That solitaire game has never looked so good. Hasn't helped me win any more than before though.
Sunday, June 17, 2012
Not quite wood, but still working
So we decided we wanted a garden this year. Now I know you are wondering what a garden has to do with a woodworking shop. Remember, the tools cut more than wood. Read on.
To do so, we had to address the concerns that kept us from having one in previous years. All of our outside water faucets are softened water and we know that doesn't do plants any favors. The other thing we needed to deal with were the four-legged friends we have living in the neighborhood.
We came to the conclusion that a container garden on our deck was a logical answer to our friends but made the watering part a hassle. That's when we found the book "The Vegetable Gardener's Container Bible" by Edward C. Smith. In it we found directions for making self-watering containers. Below is how we adapted the information in the book to fit our needs and accomplish what we wanted. You will have to go all the way to the end to see if it worked.
We went to Home Depot and bought the containers with the tops and some 4" PVC pipe. The PVC got cut up into 5" segments. There are six pipes in each container. We cut a hole in the side of the container to add water and so that excess water ran out instead of water-logging the dirt.

Two of the pipes in each container have 12 holes drilled in them. They get filled with dirt so the water wicks up into the main container. 
According to the book, the reservoir should hold 3 to 4 days of water.
We cut the sides off the top of the container so it fit inside and rested on top of the PVC. We also cut holes in the top, above the PVC segments that had dirt in them. This keeps the dirt out of the water while allowing the water to wick up into the main container.
We lined the inside of the container with landscaping material to help keep the water reservoir free from dirt. We cut holes in the material where the openings in the cover were so the water-wicking action wasn't hindered.


This year we made 11 containers. We have planted watermelon, cantaloupe, 4 kinds of peppers, 3 kinds of beans, peas, 2 kinds of tomato, 3 kinds of lettuce, carrots, and radishes.
Shortly after planting we went on vacation for 10 days. While it was cool while we were gone, there was no rain. With a reservoir lasting only 1/3 of that time, we expected to come home to a dead garden. Below is what we came home to. I should note that the tomatoes and peppers were not started from seed.


I think it works. Now I have to make the trellises for the beans and peas.
To do so, we had to address the concerns that kept us from having one in previous years. All of our outside water faucets are softened water and we know that doesn't do plants any favors. The other thing we needed to deal with were the four-legged friends we have living in the neighborhood.
We came to the conclusion that a container garden on our deck was a logical answer to our friends but made the watering part a hassle. That's when we found the book "The Vegetable Gardener's Container Bible" by Edward C. Smith. In it we found directions for making self-watering containers. Below is how we adapted the information in the book to fit our needs and accomplish what we wanted. You will have to go all the way to the end to see if it worked.
We went to Home Depot and bought the containers with the tops and some 4" PVC pipe. The PVC got cut up into 5" segments. There are six pipes in each container. We cut a hole in the side of the container to add water and so that excess water ran out instead of water-logging the dirt.
According to the book, the reservoir should hold 3 to 4 days of water.
This year we made 11 containers. We have planted watermelon, cantaloupe, 4 kinds of peppers, 3 kinds of beans, peas, 2 kinds of tomato, 3 kinds of lettuce, carrots, and radishes.
Shortly after planting we went on vacation for 10 days. While it was cool while we were gone, there was no rain. With a reservoir lasting only 1/3 of that time, we expected to come home to a dead garden. Below is what we came home to. I should note that the tomatoes and peppers were not started from seed.
Saturday, June 16, 2012
Wedding Pens
Monday, May 21, 2012
Nostepinne Trilogy - The Conclusion
Well, the nostepinne is off the lathe and ready for use. It's making the trip up north this weekend.
Since the last episode it has been turned to it's final shape, sanded, finished, sanded, finished, sanded, finished, hand rubbed to a glossy shine, parted, sanded, finished, and had it's first photo session.
Here are the last in-process and finished shots.
Since the last episode it has been turned to it's final shape, sanded, finished, sanded, finished, sanded, finished, hand rubbed to a glossy shine, parted, sanded, finished, and had it's first photo session.
Here are the last in-process and finished shots.
Saturday, May 12, 2012
The Elves Strike Again
The Christmas elves have returned. This time bringing some antique planes. Here is the scoop on the new arrivals. BTW - I haven't taken time to clean them up yet so ignore the dust. I was so excited when I saw the year on them I had to get this posted.
Stanley No. 8
The Stanley #8 plane is the oldest of the bunch. With the help of the Internet (hyperkitten.com, and yes it is a family safe site) I have been able to date the plane to between 1902 and 1907 (Type 9). The #7 is a 24 inch long jointer plane.
One of the traits of Type 9 planes is the March 25, 1902 and August 19, 1902 patent dates right behind the throat.
The 'Bailey' name on the toe is a reference to the Stanley plane's designer. The 'japanning' on this plane is in pretty good shape but not perfect.
The sole of the plane is corrugated to slide across the wood better.
Like the Stanley, I believe the components of this plane are the original.
The 'japanning' on this plane is not in great shape though the condition of the wood components is is reasonable.

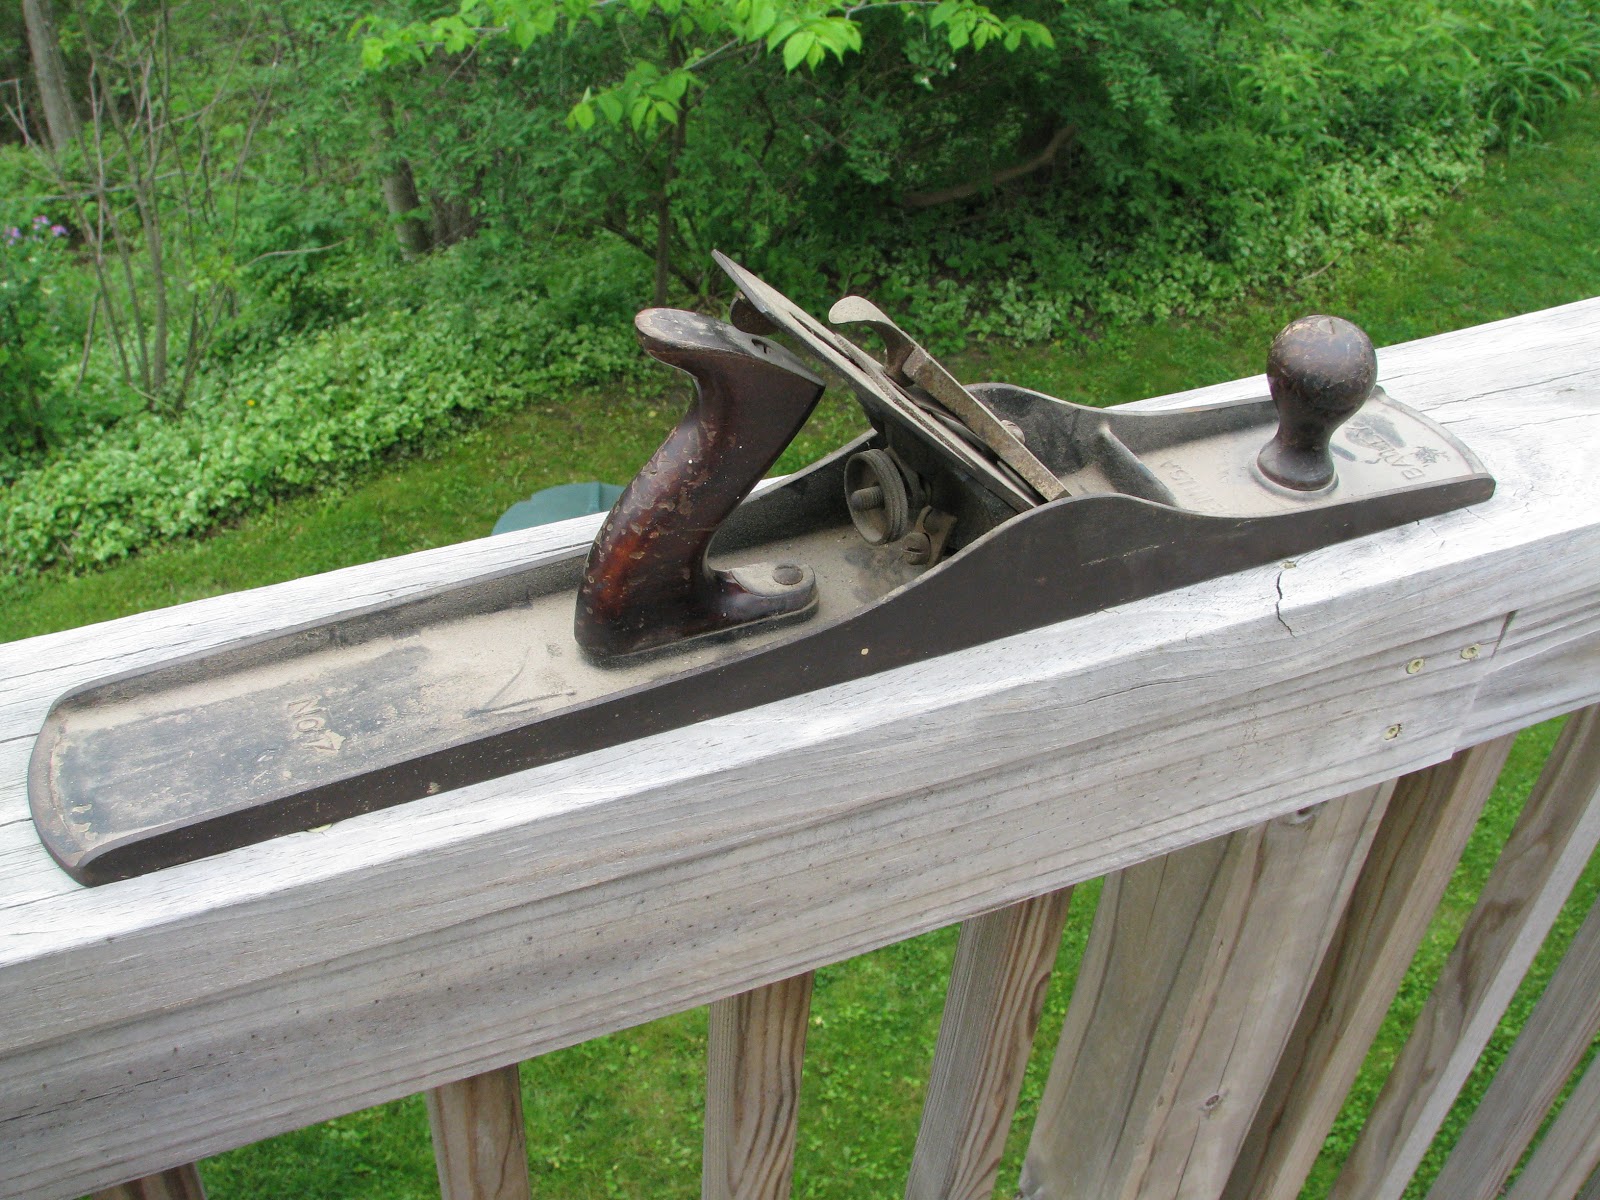
The #7 is the dirtiest of the bunch but overall in the best shape. I guess that is to be expected since it is 30 years younger. Like the others, it appears to have all of the original components. It also appears to have been well taken care of.
The colored portion of the plane appears to be in better shape than the other two. I hesitate to call it 'japanning' as Stanley began a process of lowering manufacturing costs in the 30s and I have not been able to verify the process to add the coloring.
It too has a corrugated bottom.
Stanley No. 8
The Stanley #8 plane is the oldest of the bunch. With the help of the Internet (hyperkitten.com, and yes it is a family safe site) I have been able to date the plane to between 1902 and 1907 (Type 9). The #7 is a 24 inch long jointer plane.
I believe the plane has the original handle, knob, and iron.
One of the traits of Type 9 planes is the March 25, 1902 and August 19, 1902 patent dates right behind the throat.
The 'Bailey' name on the toe is a reference to the Stanley plane's designer. The 'japanning' on this plane is in pretty good shape but not perfect.
The sole of the plane is corrugated to slide across the wood better.
Sargent Type 22(?)
I believe the Sargent plane to be a 'Type 22' manufactured between 1910 and 1918 to compete with the success Stanley was having with their planes. The Type 22 plan is a 22 inch long jointer plane.
The 'japanning' on this plane is not in great shape though the condition of the wood components is is reasonable.
The sole of this plane is smooth and in good shape.
Stanley No. 7
The Stanley #7 plane is a 22 inch long jointer plane. It is the newest of the batch, being manufactured between 1933 and 1941 (Type 16).
The colored portion of the plane appears to be in better shape than the other two. I hesitate to call it 'japanning' as Stanley began a process of lowering manufacturing costs in the 30s and I have not been able to verify the process to add the coloring.
It too has a corrugated bottom.
So you might be wondering why I would want 100 year old planes. Other than the fact that they are very cool and hold some value (considerably more than I paid for them), they are very usable. Information on rebuilding planes is readily available and these are in very good shape. A little elbow grease, maybe some new 'japanning', and probably a replacement iron, will make these planes work and look like new. Maybe even better.
Do I really need three jointer planes? It's how many I have so the answer must be yes.
Sunday, May 6, 2012
Nostepinne - Part II and other stuff
So it's been a while since I posted. I've been working on some gift items so can't publish anything about what it is. At least not until they have been given to the recipients.
I have been working on some things I can post about though.
There has been a little progress on the nostepinne. I turned it to something reselbling the shape it will be and let it rest again. Now that the other project is done I can get back to it.
I originally thought is was a black walnut but am thinking now it is an English walnut. Not sure how you would tell the difference. I just know we find a walnut like nut all over the woods.
The other thing I have been playing with is some coasters. They are simple slabs cut from a branch on a dead tree we dropped but they look pretty nice. The tree was dead when we moved here so have no idea what the leaves looked like. I just know it is a very hard wood. They will be finished with a matte polyurethane.
I have been working on some things I can post about though.
There has been a little progress on the nostepinne. I turned it to something reselbling the shape it will be and let it rest again. Now that the other project is done I can get back to it.
I originally thought is was a black walnut but am thinking now it is an English walnut. Not sure how you would tell the difference. I just know we find a walnut like nut all over the woods.
The other thing I have been playing with is some coasters. They are simple slabs cut from a branch on a dead tree we dropped but they look pretty nice. The tree was dead when we moved here so have no idea what the leaves looked like. I just know it is a very hard wood. They will be finished with a matte polyurethane.
Subscribe to:
Posts (Atom)